Monday, September 16, 2013

Flower Pot Re-do

Every time I walked by these pitiful flower pots, they just begged for me to change them, make them pretty. So I did.

I started with this.. yep, one even has a chip. Oh well, I carried on...


I went to Lowes and picked out Valspar Outdoor Color Spray Paint in Satin Honeywood. Pretty, yellow, happy color. I gave both pots 2 coats of spray paint. On the smaller pot I used a stencil to add a design and on the larger one I added glitter paint at the top. The stencil design and the stripe were painted using Martha Stewart Crafts Multi Surface Glitter Acrylic Craft Paint in Golden Beryl.

Next, I had to purchase cute flowers to go into the pots. Back to Lowes I went and purchased 2 potted plants, came home and instead of planting them immediately into the pots, I sat them on the side of our house under the dryer vent. Well, let me tell you now that sticking your potted plants under the dryer vent in summer is not a good idea. Add that to the fact that I totally forgot about them until we were outside playing and our little guy took it upon himself to urinate beside my plants and then he informed me that my plants had been "watered"!!! What is it with boys having to go to outside?!

In the trash they go!!!

Back to purchase more plants. This time I purchased mums.

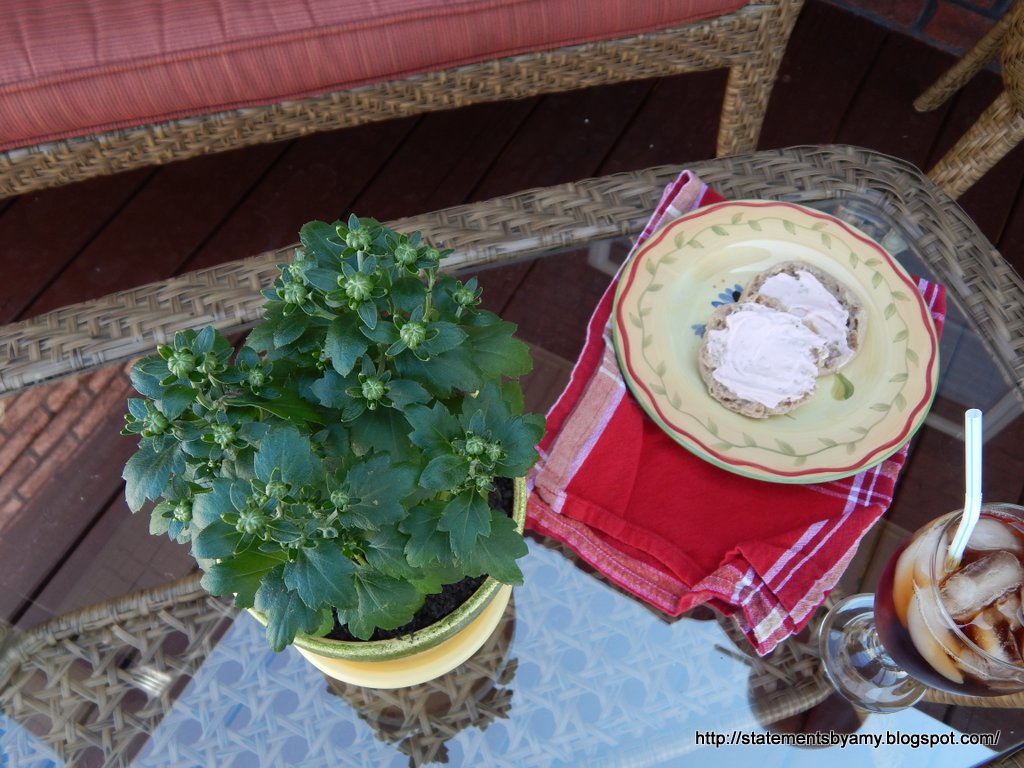
I planted them immediately in my cute little pots.

Doesn't that stencil look darling? Here is a closer look.
 
This now makes the perfect spot for a relaxing morning snack.


I just love how the glitter stripe looks, gotta add a little bling!

This was the first time I have used the glitter paint, I used 2 coats to make sure I got the coverage I wanted.

This was such an easy way to transform these ugly unused pots. At first I thought these would just be used for summer and then I would put them away but now I am sure I am going to leave them out during fall as well.

Linking up with Savy Southern Style and Liz Marie Blog.

Wednesday, September 11, 2013

Wine & Dine Wednesday


Happy Hump Day! I am so happy to be able to share this wine with you guys! The Mr. picked out this bottle at World Market. It is a blend of wines, which in my book, is a great choice.

This wine is 50% Cabernet Sauvignon, 50% Merlot and 10% Syrah (the other, where is the name comes from).  It is a 2010. For those not familiar with Syrah, it is a specific grape variety indigenous to France. For some time now growers in California and Washington state have been adding Syrah to their varieties, which has increasingly become popular.

Syrah is a thick skinned berry and almost black in color. It forms a deep, intense nearly black color of wine. The flavor is very rich, spicy and often has intense alcohol strength. The Syrah is often described as "lavish" or "voluptuous" and even on the back of this bottle is says it is "tastefully seductive" and "sin-sually delicious".  If you have not tried a wine with this variety of grape, I would suggest you try it.

Speaking of Merlot....
I purchased this at a local store at the beach. I just could not resist!

Tuesday, September 10, 2013

It's That Time of Year Again

On this particular day we were up and going way to early for a Saturday morning if you ask me. To me Saturdays are for sleeping in at least until 8am. Anyway, our youngest was up early, excited for his first flag football game. The night before I had boiled and fitted his mouth guard to his mouth which he proudly wears and for as long as I will let him.

In the car we go.

We get to the field, cars are beginning to flow in and families emerging excited to begin this new season. Me, I am praying that my little guy stays safe and doesn't get knocked down by some kid bigger than he is.


Luckily we parked directly across from the coach who has their uniforms so out little guy puts on the shirt which fits great but the shorts, no so well. So we stick with the black shorts that we have on. Turning to head to the field only to realize that we forgot the water bottle, back to the mini to retrieve it. Headed to the field again, we get to the gate and they are charging admission.

I totally forgot about this, 3 years ago when our oldest played flag football they charged admission and since then I had totally forgotten all about that. Plus for every other sport he played in this same group admission is never charged. Crazy!

Anyway, so glad I remembered that I had $10 in my wallet so back to the mini we go. again. Got the money and back to the field. I paid, we go in. Immediately I am cussing in my head because I  notice that the grass is cut perfectly but is wet, really wet. And the walk to the bleachers is at or below the 50 yard line. And I have on sandals. We arrive at the bleachers only to realize that the hard core football families brought their own yard chairs to sit in...maybe because they knew the metal bleachers would be soaking wet. Keep in mind that it had not rained, at least I don't think so, all the wet was from the morning dew I assume. So I make sure that the youngest gets with his coach and teammates and I hand over my camera to my oldest and tell him to hang out at the bleachers (another mom was there with him) while I head back to the mini to get some towels to dry off the bleachers so we can sit down.

On my way to the mini I feel so awesome of myself knowing that my prepared car kit was going to save this situation! Plus the Mr. stuck a full size bath towel into the back area for me a while back "just in case I needed it".

Anyway, I got the towels, 1 large and 2 small hand towels, so glad I had plenty so I could share with other mom sitting next to me. I look up to press the button to shut the door when my sunglasses fall off my head and hit the gravel, one of the lens  falls out. I cuss. Back to the field.

Cleaned off the area and sat down, the game begins. Goes good until this kid that is bigger than mine lines up in front of him. They get down ready to make the play. Ball moves and that big kid pushes my little man to the ground. Now you can bet that this Momma cussed more in her head plus I wanted to run out there and get him off that field. But I also know that this is part of the game so I halted. The next play came and the same kid pushes him down again. This time I was getting really aggravated. Then the lady behind me who has talked loudly about multiple subjects the entire game asked the man beside me about his son. His son, the big kid that pushed out little guy down! From their conversation I learned that this kid was much older and had played tackle football last year and for some untold reason was now back playing flag with smaller kids.


That made me mad. If your kid played tackle they should not be allowed to go back to flag. Flag to me meant for little kids to learn the game and become familiar with how it is played with a more gentle approach. Not to get out there and be pushed to the ground by someone bigger than them!
Our little guy is in kindergarten and some of the kids playing are in 2nd or apparently older.

Either way, my prayers were answered and our little guy was safe and a little worn out from all the running when we left. I asked him if he had a good time...his response was yes.

I asked him what he thought of the game. His response..."It was boring, all you do is chase a ball around."

I could not help but giggle. That is so true.

Looking forward to him finding what he likes, what he enjoys and what his passion is. That to me is what I hope he gets out of this. His passion could be baseball, soccer, golf , basketball, tennis or another sport. What I have learned in these few short years of sports that I have been through so far is that if they don't like it, it is miserable for everyone involved and if they love it, it is a joy for everyone. I prefer the joy.

Monday, September 9, 2013

DIY Chalkboard

There is a large wall that needed a little something in the kids play area. While I wanted something "kid like" yet still adult friendly and usable after the kids get older it also had to be fun for everyone.

So my solution....a chalkboard!!


First, I measured the area and decided on the perfect size. We purchased chalkboard paint and molding of our choice from Lowes. 

Here is the photo after 2 coats of chalkboard paint.
After allowing it to dry completely  we then moved on to framing our chalkboard. The Mr.  used a miter saw to cut the edges. We chose several different moldings, the top and sides are the same but for the bottom I wanted a piece a little different. I wanted the chalk to be able to sit in the bottom like a real chalkboard. In order to do that the larger flat peice in the bottom photo went on the bottom first. Then the top decorative molding went on top of the flat peice slightly higher and level with the side molding. This allows a gap to hold the chalk.

Once the molding was nailed into place, we used caulk to finish off the corners at the bottom (where the different moldings meet) to give it a more finished look and to keep chalk dust from getting into the cracks.

 The chalkboard (black area) measures 7&1/2ft x 5ft. This is fun for the kids and for the adults now but even when the kids grow up and this area is no longer a kids area this chalkboard will still work in a new design.  Now I just need to finish the rest of the kids play area! Any ideas?

Linking up to Savy Southern Style and Liz Marie Blog


Wednesday, August 14, 2013

Wine & Dine Wednesday


Yesterday morning I woke up to the lady on the radio saying that Wednesday is the day that the majority of people have a drink at home. Whoop! Whoop!

Oh yeah, I have to agree, by Wednesday I am so ready for a drink plus the fact that it is Hump Day (don't you just love that Geico commercial, I laugh out loud every. time. I. see. it!!!) Anyway, plus I think people realize that the weekend is just around the corner and it just seems like a great time to sit back and think about what fun is coming instead of the stress that the beginning of the week brings.

I came up with this drink on Wednesday as a matter of fact. I was craving grapefruit juice and I thought why not add a little rum, mint and lime.....next thing I knew I had a fabulous mojito on my hands and I enjoyed every last drop.


Here is how I did it:
1lime
5 to 8 mint leaves
Rum
Grapefruit Juice

I  began by slicing the lime in half. I then cut 2 small slices off of one half and set aside, then placed the slices of the lime in the glass and added the mint then mashed the limes and mint together (if you have a muddle it would work great). Then add ice to your glass. Add 2 oz of light rum then add grapefruit juice (I just filled up my glass to the desired amount) then squeezed the juice of the rest of the lime on top. Stir. Add mint and lime for garnish.

Enjoy.


Monday, August 12, 2013

DIY Rope Vase


It seems that rope wrapped glass has been popping up everywhere. At first I thought that this was something that I would just purchase, but after seeing the product I knew that this was something that I could do myself and save a bundle!

The first time I tried it on a different project, it did not go so well, the rope would not stick to the wood and needless to say it all went in the trash.

So I decided to try it again, this time on glass and the outcome was fabulous! I began with a vase that was given to me by the Mr. on a past special occasion full of pretty flowers. I am just so glad that I kept this vase because I loved how I transformed it into something that I can now leave out and enjoy.
 I began by finding my starting point and using E6000 glue to adhere the start of my rope. I used rope purchased at Lowes from a while back. Then I used my hot glue gun to reinforce the start then periodically glued the rope as I wrapped it around the vase till I got to the bottom. Once at the bottom I let the vase sit overnight to make sure the glue was dry then cut the rope.

I am so happy, now I just have to decide where to put it!!


Have you tried this before?

Linking up to House of Hempworths. andSavvy Southern Style and Liz Marie Blog

Tuesday, August 6, 2013

Roasted Asparagus


On several occasions while in the check out line at the grocery store, the check out lady will ask me "How do you fix your asparagus?"

Me: "It is so easy!"

Here is how I do it.

Preheat the oven to 350 degrees.

First I rinse off the asparagus then snap off the ends. Then put the asparagus into a bowl, drizzle with olive oil, salt and pepper. (I use a generous amount of salt and pepper). Mix with your hands until all spears are coated equally with oil, salt and pepper. Then spread the asparagus evenly on a sheet pan. (notice the photo above)  Bake in oven approx. 10 minutes.

Sometimes I prefer it to be more crispy so I leave it in a little longer or if I prefer it to be more raw I leave it in less time. Each time I do it , it depends on my mood how I roast it, so just play around with this until you figure out your preference.  Either way it is so simple and easy!

Enjoy!

Linking up with Let's Get Bananas and Blissfully Miller.